Showing posts with label Vegan. Show all posts

Monday, 21 August 2017

Bad Friends Make Good Pasta

I am such a bad friend. I shared a picture on my IG of a superfast pasta dish and didn't share how I made it. It was late, I was starving, I didn't even take very good pictures. But I guess it sounded good. Certainly tasted good! So I'll let you in on this secret: it's super easy. I promised to post it (albeit a day late) so that you can enjoy it this week too!

Too hungry to take good pictures. Easy homemade roasted red pepper and garlic sauce on Pedon red lentil penne. 
#allergyfriendly #vegantoo #easydinnerideas #lentils #roastedpeppers #roastedgarlic


Roasted Pepper and Garlic Pasta Sauce 

4-6 red, orange and/or yellow bell peppers
Half a head of garlic, unpeeled
1 tbsp of dried herbs (my fave is Simply Organic Oregano)
1 tsp+ kosher salt
2 tbsp+ grapeseed or olive oil
Cracked bell pepper to taste

To roast your peppers and garlic:

Either preheat your oven to 400 degrees or fire up your BBQ (like I did in this week's heat). Lay your bell peppers on their side on a cookie sheet. In a small square of aluminum foil, place your half a head of garlic on it and drizzle a bit of oil on it. Maybe sprinkle a bit of salt. If you have it, some fresh rosemary or thyme wedged between the cloves will add to the flavour. Fold or crumple the foil over it so that it's pretty good at keeping in the air and steam. Place them both on the same baking tray and place in oven or on BBQ. Turn peppers every 15-20 minutes. After about three turns, both your peppers and garlic will be done. The peppers will be mostly blackened and the flesh will be soft and better yet, the pepper will deflate when you take it out of the oven or off the BBQ. Allow to cool. If you want to speed up the process, carefully pick the stems out and open the foil to the garlic but *CAUTION* hot steam will escape. Wear an oven mitt and keep your face and other body parts away from that torture! This is dinner, not war.

Once cooled, peel the skin off the peppers and put the flesh (not the seeds inside of the pepper) in a cup or bowl. Squeeze the garlic from the peel. It should be soft and sort of ooze out of its papery shell. Then add your garlic, herbs, salt, oil and pepper to the peppers and blend with a hand blender (or use a regular blender) until smooth. Taste and adjust seasoning. Pour over cooked pasta. I love Pedon's More Than Pasta Red Lentil Penne or Chickapea Organic Chickpea and Red Lentil Pasta. It adds protein and fiber without me needing to add anything else to the meal.

Hope this helps, next time I promise to be a better friend. :) Until then, enjoy pasta!

Thursday, 27 July 2017

Surviving Your Stay When You're Far, Far Away

In my previous blog post I discussed some basic tips for traveling with allergies.  It's really all about preparation.  Depending on where you are going and what's available along the way, the level of preparation will be different with each trip.  This blog post discusses some of the preparations I made for my trip almost a year ago.

To the very end of the long dirt roads of northern Saskatchewan, a group of us planned to go.  All food up there is incredibly expensive, given the 12+ hour journey it has to make from main cities and truck routes.  As you can imagine, allergy-friendly options would not be available.  Plus, we had arranged to stay in a motel with nothing more than a mini-fridge and a microwave between the group.  I had to bring my own food, but how would I do that?  Many foods wouldn't even survive the journey in the hot van, nonetheless two weeks in a mini fridge.

After careful thought I figured out a solution: a Crock-Pot.  I already had one of the smallest sizes you generally find in stores, 4.5 quarts.  Really though, it's way too much for one person, which is why it was went unused at home.  A quick search on Amazon revealed a 2.5 quart option though, HURRAY!


But now, what to cook?  I took a chance on the cookbook Amazon recommended with the Crock-Pot, Vegan Slow Cooking.  It's meant for smaller servings and smaller slow-cookers.  I figured I'd get at least one or two recipes in it, which is a win if you're allergic to tomatoes, looking for Crock-Pot recipes.  When it arrived, I sat down and started flagging possible recipes and, BEHOLD!  18 separate recipes I was interested, and able, to try ranging from breakfast to dinner.  The recipe for Golden Veggie Bouillon Powder was genius and pretty much stable for the trip up.  I decided to dehydrate all the fresh produce I needed to save space, weight and freshness (because of lack of refrigeration).  A little extra liquid would be added to compensate.

For breakfasts I chose the Apple Chai Oat Groats and the Indian Carrot Halwa Oatmeal.  For lunches and dinners I used the Pear Chickpea Fall Stew, New Orleans Red Beans and Rice (paired with millet instead of rice) and Root Veggie Barley Risotto.  So far all the recipes I've made have tasted great!  Highly recommend it.

To add a bit of variety I also used some internet-searched recipes:

Pineapple Coconut Farro (I replaced the farro with barley with no issues) as a breakfast option.

Pumpkin Pie Steel Cut Oats...because, you know, I like my oats!

Slow Cooker Pumpkin, Chickpea and Red Lentil Curry was a clear favourite of mine from the start.  I added dried butternut squash to increase the nutrition of it even more.  FYI: the recipe fills the tiny Crock-Pot to the max, might want to half the recipe if your slow cooker is the same size as mine. 

Mushroom Barley Stew was terrific, but I did double the carrots and add celery.   I seem to like my vegetables.  If only I was more keen on them in my early years.  I even don't normally like mushrooms, but I chopped up the store-bought dried mushrooms tiny and they were indistinguishable from the barley.

There's NO Chili in my Chili was surprisingly good.  I had no idea what to think given the ingredients.  No tomato...but pumpkin?...soy sauce?  This recipe bursts out of 2.5 quart slow-cooker, so consider halving it.  Well, at least it burst out of the Crock-pot after I added a ton of extra dried bell peppers and a little extra liquid. Keep in mind that tomato-free chili will naturally be different in texture, thickness and taste (just like my White Bean Chili), but it is no less delicious. 

In the weeks leading up to the trip I carefully dehydrated all the veggies and fruit that I could, bagging them by recipe with their spices and grains.  I carefully wrote out a list of what was still needed grocery-wise in Saskatoon before our long drive.  It was the most preparation I had ever put into a trip but I was incredibly thankful that I did because I had no need to worry while I was traveling.


I also packed a few food containers (because leftovers were the next day’s lunch and/or dinner), a strainer (for rinsing and dishwashing), cutlery and a utility knife with a small cutting board (I did buy a bag of fresh apples to eat with Sunbutter). A small vacuum-insulated food jar was also perfect because I would set the Crock-Pot on during most nights and then in the morning I got up, filled my food jar, and it stayed hot until lunch, wherever our travels took us. And of course a can opener, mine from Pampered Chef, to open all the cans of beans and coconut milk.

The Crock-Pot went into my carry-on along with a few other cooking items. We got the last of the groceries in Saskatoon when we arrived and after our long drive all I had to do was put the Crock-Pot on with the contents of one ziploc and some liquid.  A few hours later I was enjoying a hot meal! I would alternate between making breakfasts and lunches/dinners.  Even towards the end of the trip, I was still enjoying new, hot meals and my poor friends were still working on their flat of Chunky canned soup.  

 I'll admit that this particular trip was on the extreme end of the scale for trip-food preparation.  Some say that this would be good for emergency kits, what do you think?  My next blog post discusses some of the easier trips that followed, stay tuned!


Wednesday, 3 June 2015

Cuckoo for Coconuts

Not only do coconuts remind me of my most favourite place in the world (Hawai'i), but they are very versatile.  Think of its many forms: young fresh coconut, mature fresh coconut, coconut oil, light and premium coconut milk, coconut cream, shredded and flaked coconut.... the list goes on!  Now consider the many ways to USE coconut: in dairy-free ice cream; in curries and some stews; as a replacement for cow's milk and butter in many recipes; in making sweetened condensed coconut milk and coconut whipped cream (thanks Detoxinista for all the wonderful ideas); and making delicious Tropical Oat Bars .  So today's post is a tribute to the mighty coconut, as a further reminder of just how much fun coconut can be for a person with dairy allergies.


My coworker introduced me to Detoxinista's site not long after I was first diagnosed with all my allergies.  She told me that the site was filled with recipes that even my homeopath would approve of and she was so right.  Especially to appease my sweet tooth, her recipes have never steered me wrong.  Above is my results when I made her Easy Coconut Macaroons.  As the name implies it really was easy.  The only prep work required is the time-consuming yet still easy Sweetened Condensed Coconut Milk.  Knowing what I know now it's easy for me to make random batches as well because I just combine the three ingredients until I get the desired consistency and flavour.  HIGHLY recommend.


I've also recently purchased the app from Hippie Lane, an Australian based company run by a fantastic group of people who cater toward certain intolerances.  Their goodies, *SWEETS*, are mostly raw and it started me off on trying some raw vegan desserts.  Even though I made some heavy alterations to the recipes to make it friendly to my diet, it's great inspiration!  Below is my adaption of their Chocolate Raspberry Layer Cake.  It's dense and delicious, rich and with a fresh cherry flavour!


Cherry Choco Layer Cake
Adapted from the Hippie Lane App


Crust:
1 cup pumpkin seeds
1 cup shredded unsweetened coconut
1/4 cup carob (or less of cocoa) powder
1/4 cup maple syrup
3 medjool dates, pitted
Pinch of salt

Filling (make sure all ingredients are room temp or ever so slightly warm for them to combine properly):
1 1/2 cups fresh young coconut flesh (sold in my grocer's freezer section so it must thaw first before use)
1/2 cup maple syrup
1/2 cup melted coconut oil, barely warm
5 tbsp full fat/premium coconut milk
1 tsp vanilla extract
Pinch of salt
1/2 cup carob powder 
1 cup cherries (if frozen, needs to be fully thawed and at room temp)
Up to 2 extra tbsp of full fat/premium coconut milk

'Chocolate Glaze'
2 tbsp coconut oil
1 tbsp carob powder
1 tbsp maple syrup


For the crust, in a food processor, process the pumpkin seeds until they're in small pieces, but not powdery. Turn off the processor and pile in the rest of the ingredients and pulse until sticky. It won't gather together but you should be able to press it firmly into an 8" round cake pan. Place in freezer while you make the filling.

For the filling, process the coconut flesh, syrup, oil and 5 tbsp milk, extract and salt together until smooth and creamy. Take 1/2 of the mixture and in a bowl, add the carob powder, once mixed spread it onto the base and place in the freezer while you make the cherry filling. 

Use the other 1/2 of the mixture, place in a blender or back in the food processor with the cherries and the extra coconut milk. Blend until mostly combined and smooth, though there will probably be bits of cherry left. Spread on top of your choco layer and place in freezer again. Freeze for 3-4 hrs.

For the glaze, combine all ingredients in a microwave safe bowl, and microwave at a power level 2-3 (out of 10) for about a minute until the coconut oil is just barely melted. Drizzle over the finished cake and place back in the freezer for 10 minutes. To serve, heat a large knife under very warm or hot water. Keep doing it with every slice for clean cuts and enjoy!

There's always more recipes out there with coconut, so if you can eat it, enjoy it and the many wonderful things that you can do with it! 

Finding Lost Treasure


I just about cried when I found this recipe.  I thought I had looked everywhere.  I had gone through my recipe binder (which is in serious need of updating but more on that another day), gone through every notebook and cookbook and everything in between to no avail.  Nothing.  I had lost my recipe forever.  It was so simple, and yet, I couldn't remember it.  Any attempts to recall it from memory had crashed and burned.  But one day, when looking for a different recipe, a single turn of a page changed everything.  I had found it.  A crinkled print-out with a familiar picture on it.  A handwritten word with a heart drawn around it in the corner to remind me to save the recipe.  It was back, my beloved recipe was back and breakfast was again in top spot in my heart.  Now I can share it all with you!

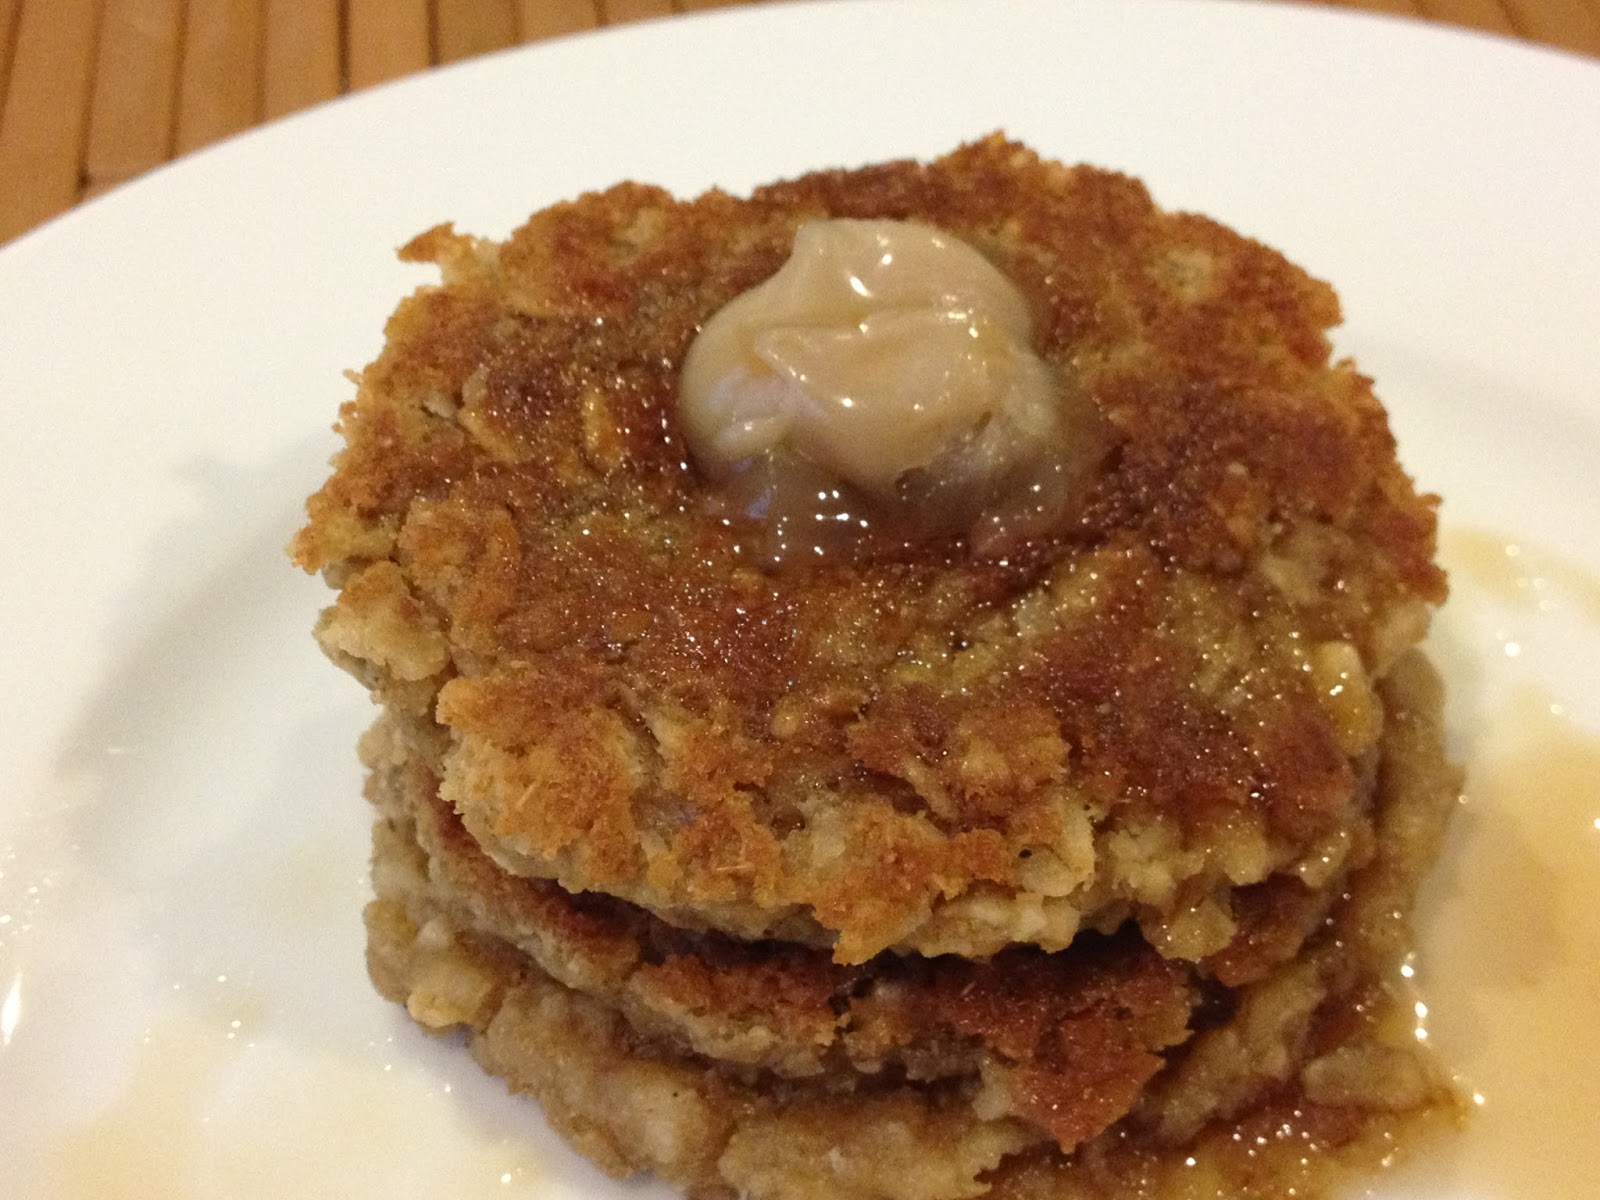
Oatmeal Coconut Pancakes
Originally found on The Kind Life website, but has since been taken down.

1 cup oat flour
1 cup quick oats
1 tbsp baking powder (though in a pinch, 2 tsp also works, perhaps even better)
1/4 tsp salt
1 cup coconut milk (or other milk of choice)
1/2 cup of applesauce (I just use a single-serve package, especially when camping)
1/2 cup of shredded coconut (optional, never exceed 1/2 cup in this recipe, it becomes dry otherwise)
1/2 cup of chocolate chips, or blueberries, etc. (optional)

Throw all of your ingredients into a bowl.  Stir.  If you feel it necessary, stir your dry ingredients in a bowl  first and then make a well and add your wet ingredients.  Allow to sit a few moments while a skillet heats up to medium-low.  Add coconut oil to a pan (or if you're camping and cooking bacon, cook a small amount of bacon and use the remaining bacon fat to grease the skillet).  Place about 1/4 cup amount of batter in the skillet for each pancake and push down so that it is about 1/4" thick. Since this isn't your usual pancake batter, it doesn't spread when you cook it so it's fine to leave just enough room for a spatula to flip them over.  Wait until the one side is golden brown and the edges appear dry.  You won't see bubbles in the top or anything like that so you just have to occasionally take a peek and make sure they're the desired colour.  Serve with whatever you like, be it maple syrup, Sweetened Condensed Coconut Milk or fresh fruit sauce.


While I was in my mourning period for my pancake recipe, when all I thought was lost, I tried to find alternative recipes for breakfast.  This winter I came across BAKED OATMEAL.  While pancakes will always have first place in my heart, this was a fast and easy alternative.  Most people were unsure of this recipe when they first heard of it, but once you've laid eyes on it, smelled it's wonderful aroma, and tasted it, you will be hooked.  So here's a bonus oat recipe, just because I know you'll love it.


Baked Oatmeal
There are a lot of baked oatmeal recipes out there, and this is a result of a lot of trial-and-error, and not really an adaption on just one recipe.

4 cups oats
2/3 cup coconut sugar (or maple sugar)
2 tsp baking powder
1 tsp salt
1 tbsp cinnamon
2-4 tbsp flax meal (or use 2 eggs with the wet ingredients if you prefer)
3 cups 'milk of choice' (i often water down a milk, who can afford to devote so much milk to one recipe???)
1 cup unsweetened applesauce (or two single-serve packages)
4 tbsp oil of choice (i use grapeseed, lately i feel like it has a buttery-like flavour, or you just use melted butter if dairy is not an issue)
1 cup raisins (optional)

Preheat the oven to 350 degrees.  Grease a 9x13" glass dish.  Stir all the dry ingredients together in a bowl, make a well and add in the wet ingredients and stir together. Let it sit for 5-10 minutes in the bowl, so that the flax meal can do it's thing.  Pour the batter into the prepared glass baking dish and bake in the oven for 45 minutes.  Half batches in an 8x8" pan will take about 25 minutes.  Basically, you want it to be golden brown on the bottom and sides and feel solid at the top when touched (not like it's still wet under the surface).  You'll have to let it cool for about ten minutes or so before you cut into it, and preferably eat them warm.  They also reheat very well, so bring them along to work the next day and tease your coworkers with the delicious scent when you take it out of the microwave or toaster oven. 

Variation:  sub the applesauce for pumpkin puree but add a little extra sweetness, I've had success adding 20-30 drops of vanilla liquid stevia instead of increasing the coconut sugar.  you can also use 1/3 cup coconut sugar and 1/3 cup molasses and use a pumpkin pie spice blend instead of just cinnamon.


Friday, 7 November 2014

Oh, for the love of OATS!

Someone recently told me his new favourite food is papaya.  We were having a great discussion on food and what we've recently developed a love for.  He turned to me with the question: What is your favourite food?  It only took me a quick second to think and I replied, "Oats!"  I think he was almost a little disappointed by my response because that conversation quickly ended.  Oh, the humble oat, so ho-hum in appearance, but how great your potential!  With oats being one of the few flours I'm able to use in my recipes, I have good reason to love them.  Perhaps if you're able to eat them, you'd agree also.

You see, there's so many possibilities with oats.  Yes, the flour can be difficult to work with.  I'll admit that.  It becomes pretty gummy if stirred too much, the finished product dry in others instance.  But I see the possibilities.  Nay, I have tasted them.

One of my most favourite cookies to make are my Oatmeal Cookies.  SO. MOIST.  So moist you can leave them on the cooling rack overnight and they'll be even better the next day when they're stale.  This recipe also has the thumbs up approval of all the raisin lovers within my department at work.


Oatmeal Cookies

1 tbsp ground chia seeds
1/4 cup +3 tbsp unsweetened applesauce
1/4 cup coconut oil
1/2 cup coconut sugar
around 40 drops of English Toffee Stevia drops (or other flavour, or even fewer drops if you don't have the massive  sweet tooth I have), or 1-2 tsp of vanilla though this will not add any real sweetness
1/2 cup oat flour
1/2 tsp baking powder
1/4 tsp salt
1 1/2 cup rolled oats
1 cup add-ins (being the raisin and coconut lover that I am I usually put in 1/2 cup of each)

Preheat oven to 350 degrees.  Prepare your chia egg with 1 tbsp of ground chia seeds and 3 tbsp applesauce combined in a small dish.  Set aside to do it's magic.  In a large bowl, stir your coconut oil and sugar together until well combined and as smooth as possible.  Add your applesauce, your stevia drops and chia egg.  Stir well.

You could use a separate bowl for this next step but I'm often to rushed and too lazy to do extra dishes SO add the rest of the ingredients to the mixture all at once, being sure to not stir until every remaining dry ingredient is in the bowl, THEN stir.  But stir only until just combined.  Like I just mentioned before this recipe, oat flour can get gummy.

Drop large spoonfuls (1/4 cup is my scoop's size) onto a parchment-lined cookie sheet, squishing them a little flat, and bake in the oven for about 12 minutes until they're golden brown on the bottom, even a little bit golden at the edges.  If you opted to make your cookies smaller, it would take less cooking time, perhaps 8-10 minutes.  Let's be realistic, who wants small cookies?  No one.

So after they've baked you can enjoy them warm (if you like them in their falling-apart-delicious state), when they're cool or even better, THE NEXT DAY.  That's right, I said it.  Try leaving them out on the cooling rack for an entire day.  Let them get "stale."  It's near impossible.  There's so much moisture in them they can weather the storm of a day's time.  Now letting them wait until the next day, that's the hard part.  Often this is the one time I can exercise restraint because I know how good they'll be the next day.  Try it all three ways and let me know which is your favourite.


Other favourites for using oat flour include Babycakes Erin McKenna's Irish Soda Bread which she shares with the world in her book Babycakes Covers the Classics.  I've also enjoyed many a Nilla wafers using oat flour and the recipe from that cookbook.  It makes me a little sad that my friend and I were never in the area of the Babycakes bakery when we were in New York.  It just always seemed to be at the other end of wherever we happened to be.  Oh well, next time!


Vegetarian Times also featured a great Chocolate Chip Cookie Recipe that I made "Lisa friendly" by doing this:

"Lisa-Friendly" Oat Flour "Chocolate Chip" Cookies

1/2 cup coconut oil
1 cup coconut sugar
1 chia egg (see previous recipe)
2 tsp vanilla extract (it often verges on 1tbsp)
2 1/4 cups oat flour
1/2 tsp baking soda
1/2 tsp salt
3/4 cup sweetened dark carob chips (I don't often eat things with processed sugar, I've heard it only makes existing eczema worse, but sometimes a girl just has to feel like she's eating chocolate chips in cookies, doesn't she???)

Preheat oven to 350 degrees.  Mix sugar and oil together until smooth, add "egg" and vanilla.  Then add all your dry ingredients to the bowl and mix until combined.  I drop by 1/4 cupfuls onto parchment lined cookie sheets, smush them a little flat and bake in the oven for about 15 mins or until the bottoms are golden brown.  Cool on a cooling rack before eating unless you want to burn the roof of your mouth on hot carob chips, which I often do.  Mmmmmm...

That recipe is surprisingly similar to an ACTUAL chocolate chip cookie with "normal" ingredients such as wheat, dairy and real chocolate.  So to get your fix when you're allergic to many a "normal" chocolate chip cookie, I suggest this one.


It really does astound me how awful I am at keeping track of my recipes.  There's this one oatmeal pancakes recipe that I thought I had lost forever.  One day I went looking for it on Alicia Silverstone's the Kind Life and could not find the recipe on the website any longer.  I googled it to death and still couldn't find it.  I tried making it from memory and that only proved frustrating and a complete waste (never trust my memory).  Eventually, I had to give up looking for it (imagine, the lights fading until dark).   Then one day, as I was looking for a completely different recipe, what happens?  I come across a print out of the Oatmeal Pancakes recipe, mixed among other printouts in a notebook.  I do a happy dance.  I quickly make them my next available opportunity.  I made them TWICE for this summer's camping trip (a hit cooked in bacon fat, sorry to those who are vegan) and now that I want to share my love of oatmeal with you do you think I can find that recipe?  Not a chance.  So now that I have dangled the prospect in front of you, please know that as soon as I find the recipe again, I will pass it on.  YUM.  Until then, have fun making cookies, or Irish soda bread or a giant bowl of oatmeal.  Whatever this post inspired you to do with my beloved Oat. 


Saturday, 11 May 2013

Say It With Ice Cream

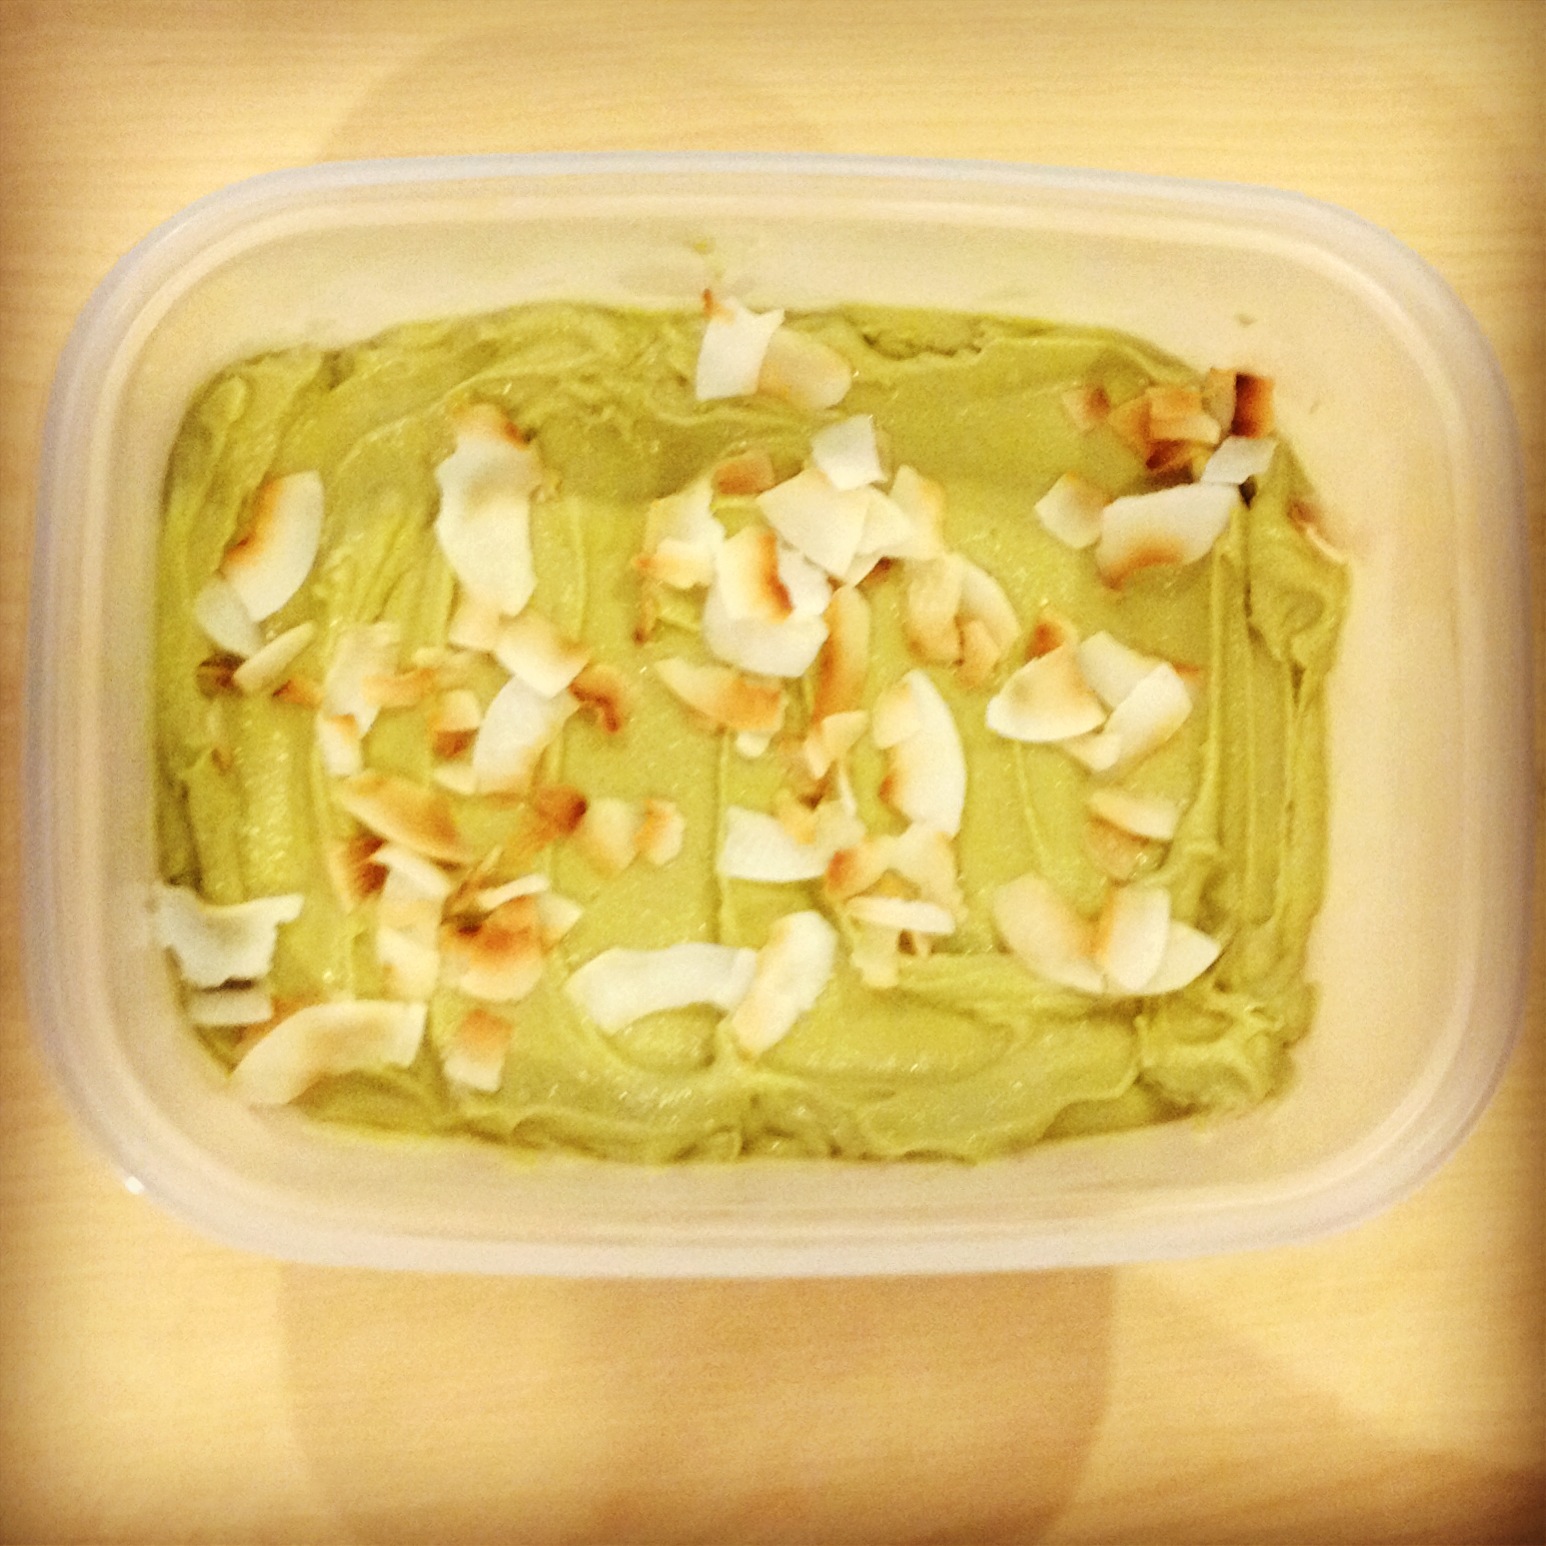
I don't always know the right things to say.  I get tongue-tied.  I embarrass myself.  Foot-in-mouth disease.  You get the picture.  So sometimes I rely on my actions to get across what I'm thinking.  Tomorrow, I'm hoping to say it with ice cream.  I know friends of mine are going through a hard time.  While others will be bringing by casseroles and saying just the right thing, I'll be bringing along this avocado ice cream.  Sounds like a strange thing, no?  But last year, we walked around the lake on a gorgeously sunny day and spent a little time afterward at my place (which just so happened to be clean).  I served them a new ice cream that I tried and still wasn't sure about, it was such a new taste for me.  They loved it.  I even got a request for seconds!  So perhaps this gift isn't going to be so strange, perhaps it will be just the right thing to say, "I'm thinking about you."  As it turns out, the ice cream has caught the attention of a few other friends and for that, I want to say, "I'm thinking about you too!" and am posting this recipe.  Perhaps you'll like it!

Avocado Coconut Milk Ice Cream
Adapted from food.com

1 1/2 cups coconut milk (about one can, regular fat preferred but light will be okay too)
1/2-3/4 cup coconut sugar (or if it's not a concern, white sugar)
2 lbs avocados, ripe (I used about 5 medium sized, that felt like they had a good weight)
2 tbsp passionfruit juice (if you're not allergic to citrus, you can use fresh lime juice)
unsweetened coconut flakes, to be toasted for garnish

In a small saucepan, heat your coconut milk and sugar on medium heat until the sugar is dissolved (not hot).  Set aside to cool while you ready the other ingredients.  Place the avocados and juice in a blender.  Once cool, add the sugar-milk mixture and blend.  It's a pretty thick mixture.  If you prefer a thinner consistency, add a little bit more coconut milk that is probably leftover in your can.  Bring out your ice cream maker and set it up.  Most frozen-bowl ice cream makers shouldn't be left out for very long before being used so I brought it out at the last moment.  Then I turned it on, poured in my mix and in about 15 minutes it was frozen!  Pour into your container and place in freezer.


Frozen deliciousness.

In an ungreased fry pan heat on medium heat and toast your coconut flakes.  Watch out, they can suddenly toast before you've realized it.  Keep tossing and turning them and you'll see the progress very quickly.  Garnish on top of your ice cream and enjoy!


Friday, 12 April 2013

Brownie Bliss


I can't believe I haven't posted this before.  I apologize for sitting on this recipe for so long and not sharing it with you.  It's good.  It's very good.  I'm normally a fudgey brownie person, but I will make an exception for these cakey carob brownies that are free of wheat, eggs, dairy, and refined sugar.  So without any further delay, here's the recipe:


Carob Brownie Bliss Bars
Adapted from Chocolate Covered Katie

1/2 cup  carob powder
1 cup rye flour
1/2 tsp baking soda
1/2 tsp salt
1 cup pure pumpkin puree
1/2 cup pure maple syrup
6 tbsp grapeseed oil (or other neutral flavoured oil)
4 tbsp light coconut milk
2 droppers worth (about 50 drops) vanilla creme stevia (or 1 tbsp pure vanilla extract)

1.  Preheat oven to 350 degrees.  Line an 8x12" pan with parchment (or use a non-stick pan)
2.  Combine the carob powder, rye flour, baking soda and salt together in a bowl.
3.  Puree with a stick blender the rest of the ingredients in a separate bowl (or cup that may be provided with your stick blender).

Mmm delicious?  Not yet, but it will be. 

Apres puree.

4.  Add the wet ingredients to the dry and before you know it, you have your brownie batter!


5.  Pour batter into the pan and spread it evenly within.


6.  Bake about 25 minutes until a toothpick comes out clean.  Leave in pan at least 10 minutes before cutting up into 24 squares, or when I am PMS-ing or just too darn emotional it makes 3-4 brownies, hahahaha. 

Killing me to take pictures before digging in!
Tada!  Now go make your yourself some and enjoy your Friday night!

Friday, 11 January 2013

Have Pockets, Will Travel

Best.  Afternoon.  Snack.  Ever.


An impending trip this spring is making me think more about what to bring for food (airport food is generally not compatible with my allergies, not to mention the food at my destination).  The Kitchn's recipe really intrigued me so I had to try my own version while I was home on my staycation, and the sweet success of it means I needed to share it with you. It's for a pocket filled with spiced lentils, roasted sweet potatoes and the closest I could get to caramelized onions.  The original recipe called for a wheat pocket dough, but I subbed an altered version of my rye pretzel dough.  Now, I'll be the first to admit, this isn't a quick recipe, it takes some time to make.  The good news is 6 pockets lasts you awhile.  The better news is that the recipe is easily doubled, so for just about the same amount of time as it takes to prep 6 you can prep 12.  I've tried to take a few shortcuts, to see if I can get the same or similar results, but it just doesn't really turn out as good as the original, so set aside a few hours one evening and you will be able to reap the benefits for days to come. 

Spiced Lentil, Sweet Potato & Kale in Rye Pockets

For the dough:
1 cup warm water
1 tbsp coconut sugar
1 1/2 teaspoons active dry yeast
2 1/2 cups rye flour (dark rye is going to make it heavier but will still work, finely milled rye flour is probably better)
1 1/4 tsp salt

For the filling:
2 small sweet potatoes, (or one large) scrubbed clean
2 tablespoons olive oil, divided, plus more for brushing
1 yellow onion
2 cloves garlic, minced
1 teaspoon ground cumin
1/2 teaspoon ground cinnamon
1/2 teaspoon ground allspice
1/2 cup French green lentils, picked over and rinsed
2 cups water or vegetable broth
1/2 bunch kale, tough ribs and stems removed
1/2 teaspoon  kosher salt

Combine the warm water, coconut sugar and yeast in a small bowl and let it sit, as the yeast proofs.  I think this is key to maybe why the yeast still seemed intact the last time I made my pretzels (though the recipe still worked, I wonder if they would have risen better had I proofed the yeast).  Meanwhile, combine the flour and salt in the bowl of a stand mixer fitted with a dough hook and mix on low speed. Knead for 7-10 minutes until dough is smooth. Place the dough in a greased (could be with olive oil) bowl and cover with plastic wrap and a tea towel. Let rise for 1-2 hours in a warm spot while you prepare everything else.

Preheat the oven to 400°F. Stab all over the top of the sweet potatoes with a fork (good time to get out some aggression, just don't get carried away and stab your hand) and place on a baking sheet. Bake 45 minutes to 1 hour, or until very soft to the touch. Set aside to cool.


Cut the onion in half, thinly slicing one half to caramelize and dice the other half.  Warm 1 tablespoon of olive oil in a heavy skillet over low heat. Add the thinly sliced onion and cook, stirring occasionally, until onions are caramelized, about 20-25 minutes. While that's cooking, heat 1 tbsp of oil in a saucepan over medium heat and saute the diced onion and garlic until onion is translucent. Add the cumin, cinnamon and allspice to the saucepan, stirring until fragrant, about 1 minute. Add the lentils and water. Bring to a boil over high heat, then lower heat and simmer uncovered for 15 minutes. Meanwhile, cut the kale into bite-size pieces. Add kale and salt to the lentils. Cover and simmer for 10-15 minutes more, until lentils are soft but not mushy. Taste and adjust seasoning.  Strain out what's left of the liquid and set aside to cool. 


Increase the oven heat to 450°F. Divide the dough into 6 pieces and let rest, loosely covered with plastic wrap to keep it from drying out. Slice open the sweet potatoes and spoon out the insides. Mash with a fork until smooth and add a sprinkle of salt, if needed.


On a well-floured cutting board, roll a piece of the dough into an 8 or 9" oval.  Spread a few tablespoons of sweet potato over half the dough, leaving room at the edges to seal the pocket closed. Cover that with lentils and kale. Top with a small amount of caramelized onions. Fold top half of the dough over, and pinch and fold edges to seal shut securely, you may have to wet the edges with a small amount of water on your finger.  Place on baking sheet, repeat with remaining dough and filling.  Brush tops with olive oil and cut 2 or 3 small slits in each pocket to allow steam to be released while baking.


Bake for 25-30 minutes, or until browned. If you are are enjoying the fruits of your labour right away, wait 5-10 minutes for the contents to cool enough to not burn your mouth. To freeze, let the pockets cool completely and wrap each pocket in foil and place inside a plastic bag and freeze.  When thawing it's best to do so in the fridge overnight first, rather than in the microwave from frozen which can make the dough a little tough to chew.


Well, I feel more prepared for my upcoming vacation!  ...And perhaps a few pangs of hunger in between!

Wednesday, 2 January 2013

Time for Chili When it's Chilly

Baby, it's cold outside!  The West Coast feels like winter now.  We may not have a lot of snow here in Vancouver, in fact, we barely get any snow at all.  A couple of weeks ago we got a few inches, and despite the downpour of rain since, there are still a few select piles of debris-filled snow pushed up against the edges of driveways and sidewalks.  This morning I had to scrape my windows free of a strange form of frost, the regular angle of the scraper didn't quite cut through it.  Though our winters pale in comparison to the rest of the country's, cold weather leaves me with a craving for soups and stews.  It's only when you go on a search for a soup or stew recipe without tomatoes or chicken, that you can feel like no safe recipe exists.  Do not fret if you too have experienced this.  During a daily hunting session of Tastespotting, I came across this awesome recipe for white bean chili.  It required only a minor dairy-substitution.  I do have a healthy appetite so I really think that this recipe makes only 4-6 servings but they are delicious servings nonetheless!  And guess what, fellow singles?  This recipe can easily be halved and make about 2 generous servings (1 for now, 1 for later, I like doing that a lot).


White Bean Chili

3 yellow onions, diced
2 poblanos, seeds removed and diced
6 cloves of garlic, minced
3 tablespoons of grapeseed (or another high-heat oil)
1/3 cup of cilantro, chopped
2 19oz cans of white kidney beans (I know, my kidney beans are red in this picture, it was one of those moments where you look in the cupboard and go, 'I thought I had one more can...?"), drained and rinsed
1 tablespoon of oregano
½ teaspoon of cayenne
½ teaspoon of cumin
2 cups of vegetable broth
1 cup of canned coconut milk (I used full fat, to help thicken)
diced avocado to top

In a large, heavy pot, heat the oil over medium heat and add the onions and poblanos. Cook for about 5 minutes, until the onions are translucent. Add garlic and cook for about 1 minute.  Add the beans, cilantro and spices. Stir and cook for about 1 minute.  Then add the vegetable broth and milk. Stir, bring it to a boil, then reduce to a simmer. Cook uncovered for about 30 minutes. The chili should start to reduce and thicken.  Serve with diced avocado and enjoy!

Easy as pie!....Or chili....

This recipe was just the right thickness and heat for me.   I may still have a problem with the nightshade family in general (potato and tomato allergy, bad experiences with eggplant, so peppers may not be the best foods for me to consume but so far I haven't noticed any bad reactions of any sort), so I'm going to keep this recipe to enjoy in moderation.  My extra servings goes into the freezer to be enjoyed another day when the cold temperatures outside bring on another craving for this delicious chili. 

Bad Friends Make Good Pasta

I am such a bad friend. I shared a picture on my IG  of a superfast pasta dish and didn't share how I made it. It was late, I was starvi...